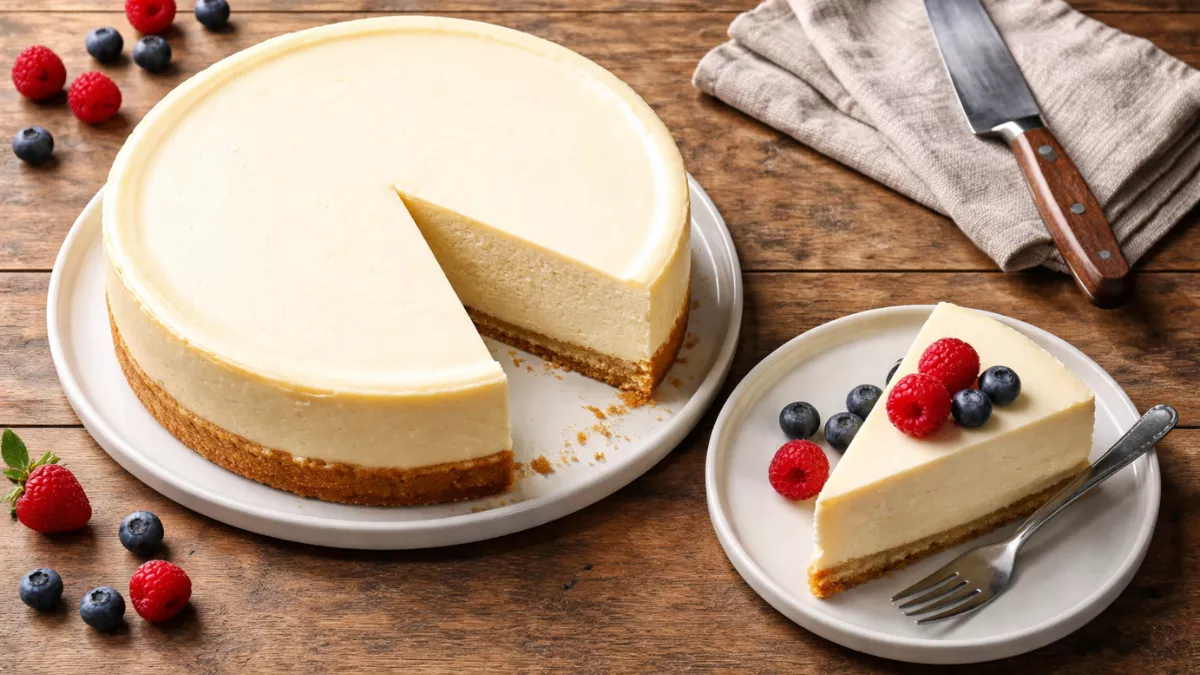
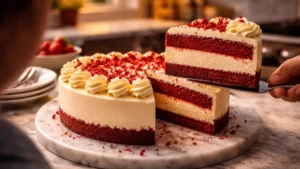
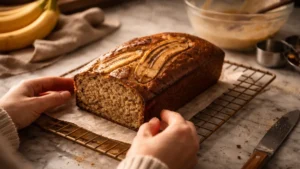
There’s a specific kind of disappointment that comes with slicing into a store-bought cheesecake. The texture is often dense, sometimes even grainy, and the flavor relies more on sugar than the rich, tangy profile of real cream cheese. You might find yourself wondering why a dessert that looks so simple in a bakery case feels so difficult to master in your own kitchen. The gap between a good cheesecake and a truly great, classic New York-style cheesecake often comes down to technique, not talent.
If you’ve ever stood in the dairy aisle, boxed mix in one hand and a block of cream cheese in the other, unsure of which path leads to the best result, you are not alone. Many home bakers assume this dessert is reserved for professional pastry chefs. The truth is, with the right guidance and a few specific steps, creating that iconic creamy, dense, and velvety dessert is entirely achievable in a standard American home oven.
This guide will walk you through the seven essential steps to building a flawless New York cheesecake. By the end, you will understand not just the “how,” but the “why” behind each technique, giving you the confidence to create a dessert that rivals any high-end deli in Manhattan.
The Foundation Starts with the Right Ingredients
The problem many home bakers face is underestimating the importance of ingredient quality. Using low-fat cream cheese or pre-shredded graham cracker crusts can seem like a time-saver, but they fundamentally alter the final product. A New York cheesecake is celebrated for its richness; cutting corners on the base components leads to a watery texture or a crust that crumbles rather than cuts cleanly.
The reason ingredient selection matters so much is that this dessert has very few components. Unlike a complex layer cake that masks flaws with frosting, a cheesecake stands naked on the plate. The flavor of the cream cheese is the star. For the best results, use full-fat, block-style cream cheese from a brand you trust. Avoid the tubs labeled “spreadable,” as they contain added air and stabilizers that disrupt the batter’s emulsion.
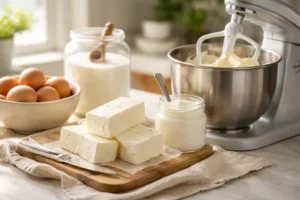
A practical solution is to stick to a short list of high-quality ingredients. You will need full-fat cream cheese, large eggs, granulated sugar, pure vanilla extract, sour cream (for that signature tang), and a pinch of salt. For the crust, choose graham crackers you crush yourself or a high-quality pre-made crust. Allowing your cream cheese and eggs to come to room temperature before mixing is not a suggestion; it is a requirement. Cold ingredients create a lumpy batter, which results in a dense, uneven bake.
A real-life example comes from a baker in Chicago who spent two years trying to replicate her grandmother’s recipe. She assumed the recipe was the secret. When she finally switched from generic low-fat cream cheese to a full-fat brand and started tempering her ingredients, the texture transformed overnight. It was a simple swap, but it turned a good cake into a memorable one.
Mastering the Art of the Crust
A common issue is the crust becoming soggy or crumbling apart the moment you try to serve a slice. Nothing ruins the presentation of a beautiful, creamy cheesecake like a crust that disintegrates under the weight of the filling. Many people press the crust in and assume the baking process will take care of the rest, but this often leads to disappointment.
The reasoning behind a fragile crust usually comes down to a lack of structural binding and improper pre-baking. The butter in the crust needs to melt and then re-solidify to create a solid shell. If the crust isn’t baked before adding the filling, the moisture from the batter seeps in, leaving it soft and unstable.
The practical solution is to treat your crust with the same care as your filling. After mixing your graham cracker crumbs with melted butter and a touch of sugar, press the mixture firmly into the bottom and slightly up the sides of a springform pan. Use a flat-bottomed measuring cup to pack it down tightly. Bake this crust for about 10 minutes at 350°F (175°C). This pre-bake sets the structure, creating a waterproof barrier that will stay crisp and sturdy even after the cheesecake chills overnight.
For home bakers in places like Portland, Oregon, where the climate is humid, this step is crucial. A local baker found that her crusts were always falling apart during summer months. Once she started pre-baking the crust and letting it cool completely before adding the filling, she finally achieved that clean, photogenic slice that held its shape perfectly on the plate.
Achieving a Lump-Free, Silky Batter
The problem of a lumpy batter is one of the most frustrating hurdles. You might mix for what feels like forever, only to pour the batter into the pan and see tiny, unincorporated chunks of cream cheese floating in the mix. This leads to a final texture that is uneven, with pockets of dense cheese surrounded by a lighter, airier cake.
The insight here is that over-mixing and under-mixing can cause the same issue. However, the primary culprit is usually temperature inconsistency. When cold cream cheese is beaten with sugar, it clings to the mixer’s paddle rather than softening. To compensate, bakers often over-beat, incorporating too much air, which causes the cake to puff up and then crack as it cools.
The solution requires patience and a gentle hand. First, ensure your cream cheese is truly at room temperature—this can take an hour or more. Beat the cream cheese and sugar on medium-low speed just until smooth. You should not see any chunks. Next, add your eggs one at a time, mixing on low speed until each is just incorporated. Over-mixing the eggs adds air, which leads to cracks. Finally, fold in your sour cream and vanilla by hand with a spatula. This method ensures a silky, dense batter without the excess air bubbles that cause structural problems.

Consider a baker in Atlanta who runs a small home-based business. She used to rely on a stand mixer for the entire process, often ending up with cracked tops. After switching to hand-mixing the final stages and obsessing over room-temperature ingredients, she reported that her cheesecakes came out perfectly level and smooth every single time, significantly reducing her waste and increasing her customer satisfaction.
The Water Bath Technique Explained
Fear of a water bath (bain-marie) is a genuine problem for many home cooks. The idea of placing a springform pan, which is designed to come apart, into a pan of boiling water sounds like a recipe for disaster. Many bakers skip this step entirely, hoping their oven will magically produce a creamy texture, only to end up with a cracked, dry, or over-baked dessert.
The reason a water bath is non-negotiable for a true New York-style cheesecake is that it provides gentle, even heat. Cheesecake is essentially a custard. If it bakes in dry heat, the outer edges cook much faster than the center. This causes the proteins to tighten and crack on the surface. The steam from the water bath keeps the environment humid, allowing the cake to cook slowly and evenly from the outside in.
A practical solution to the fear of leakage is to invest in high-quality, heavy-duty aluminum foil. Wrap the outside of your springform pan with two or three layers of foil, making sure the foil comes all the way up the sides to prevent water from seeping in. Place this wrapped pan into a larger roasting pan. Pour hot water into the roasting pan until it reaches about halfway up the sides of the springform pan. The hot water ensures the oven temperature doesn’t drop drastically when you put the pan in.
For a home cook in Los Angeles, mastering the water bath was the turning point. She had been making cheesecakes for years, always accepting the large cracks as a character flaw of the dessert. When she finally committed to the foil-and-water-bath method, she was stunned to pull out a cheesecake with a perfectly smooth, unblemished top. It transformed her perception from a “rustic” dessert to a refined, elegant showstopper.
The Low-and-Slow Baking Method
Impatience during the baking process is a common issue. After all the prep work, it is tempting to crank up the oven temperature to speed things up. However, a high-temperature blast is the fastest way to ruin the delicate custard texture you are trying to achieve. The result is often a puffed-up dome that collapses into a deep canyon of a crack as it cools.
The insight lies in understanding how custards set. A New York cheesecake should not bake until it is solid. It should bake until the edges are set but the center still has a distinct wobble—about a two-to-three-inch circle that jiggles like Jell-O when you gently shake the pan. This residual heat will continue cooking the center as it cools. If you wait until the center is firm in the oven, it will be over-baked and dry once it reaches room temperature.
The solution is to bake at a lower temperature, typically 325°F (163°C), for a longer period. Once the cheesecake has baked for the recommended time (usually 60 to 80 minutes for a standard 9-inch cake), turn the oven off. Crack the oven door open slightly and let the cheesecake sit inside for another hour. This gentle cooldown period prevents the sudden temperature shock that causes cracks.
A baker in Denver, dealing with the challenges of high-altitude baking, found that this method was her saving grace. By extending the rest time in the oven and ignoring the clock in favor of the “jiggle test,” she stopped fighting with cracked tops and started producing cheesecakes that were uniformly creamy, with a texture that her customers described as “like eating a cloud.”
The Critical Cooling and Chilling Phase
The problem here is usually impatience or a lack of planning. After hours of work, the natural instinct is to want to see the finished product. Taking the cheesecake out of the water bath and immediately trying to remove the springform collar or slice into it is a common mistake that leads to a crumbled, messy disaster.
The reason this phase is so critical is that a cheesecake is structurally vulnerable when warm. The fats are still soft, and the structure hasn’t fully set. If you remove the pan’s sides while the cake is warm, the outer edges will collapse or stick to the metal. Cutting into it while warm releases all the trapped steam, causing it to deflate and lose its dense, creamy texture.
A practical solution is to incorporate the cooling process into your timeline. After removing the cheesecake from the oven and the water bath, let it rest on a wire rack until the bottom of the pan is cool to the touch, about one to two hours. Then, run a thin knife around the edge of the pan to loosen it, but do not remove the collar. Refrigerate the cheesecake uncovered for at least four hours, though overnight is far better. This extended chill allows the proteins to set firmly, creating that signature dense texture.
For a family in Texas preparing for a holiday gathering, this was a lesson learned the hard way. One year, they tried to serve the cheesecake two hours after it came out of the oven. It was a soupy mess on the plates. The next year, they prepared it two days in advance, allowing for a full 24-hour chill. Not only was it perfectly sliceable, but they noted that the flavor had deepened significantly, tasting richer and more balanced after the extended rest.
Slicing and Serving for the Perfect Presentation
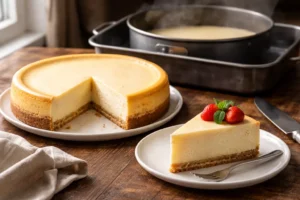
You have put in the work, and the cheesecake looks beautiful. The final problem is presentation. Using a standard dinner knife to slice into a cold, dense cheesecake often results in jagged edges, crushed crust, and uneven portions that look amateurish despite the effort put into the bake.
The reason slicing is difficult is due to friction and adhesion. The creamy filling is sticky, and a thick knife blade pushes the cake rather than cutting through it. This compression causes the delicate crumb to squish and the crust to break away.
The practical solution involves two simple tools: a long, sharp chef’s knife and a tall glass of hot water. Before each slice, dip the blade of the knife into the hot water and wipe it dry with a clean towel. The residual heat on the blade glides through the cold, dense filling without dragging or tearing. For the cleanest presentation, wipe the blade clean between every cut. This method ensures each slice looks professionally plated.
A caterer in New York City, who specializes in desserts for private events, shared that this is the only method she trusts. She trains her staff to keep a hot water station set up specifically for cheesecake service. She notes that when guests see a perfectly sliced, clean-edged cheesecake, it elevates the entire dining experience, making a simple dessert feel like the grand finale it deserves to be.
Conclusion
Creating a classic New York cheesecake is less about having professional training and more about respecting the process. By focusing on the details—bringing ingredients to room temperature, securing a water bath, baking low and slow, and allowing for a proper chill—you remove the guesswork that leads to cracks and dense textures. Each step you take builds upon the last, ensuring that the final result is not just a dessert, but a reliable staple you can be proud to serve. Whether you are baking for a holiday gathering or simply to satisfy a craving, these seven steps provide the foundation for a creamy, classic dessert that tastes as authentic as anything found in a Manhattan deli.
FAQs
What is the difference between regular cheesecake and New York cheesecake?
New York cheesecake is distinct because it uses more cream cheese and often includes egg yolks and sour cream to create a denser, richer, and creamier texture compared to regular cheesecakes, which tend to be lighter and fluffier.
Why does my cheesecake always crack on top?
Cracking is usually caused by over-baking or rapid temperature changes. To prevent this, use a water bath for gentle heat, bake until the center is just slightly wobbly, and allow the cheesecake to cool slowly in the oven with the door cracked open before refrigerating.
Can I freeze a New York cheesecake?
Yes, New York cheesecake freezes exceptionally well. For best results, cool the cheesecake completely and refrigerate it first to set the structure. Wrap it tightly in several layers of plastic wrap and then foil. It can be frozen for up to three months.
How do I know when the cheesecake is done baking?
The best indicator is the “jiggle test.” Gently shake the pan. The cheesecake is done when the outer edges are set and puffed slightly, but the center still has a noticeable wobble, about the size of a silver dollar. It will firm up as it cools.